Osrs Rogue Outfit How Do You Know What Box to Pick
![]()
The Rogues' Den is a minigame. While there aren't any requirements to enter the expanse itself, a player must accept 50 Agility and 50 Thieving in order to start the minigame.
The Rogues' Den is located under the Burthorpe Inn. The quickest way to get there is by using a games necklace to Burthorpe and running south into the bar and downwardly the trapdoor next to the bartender. You can likewise employ the Minigame Group Finder teleport to Burthorpe Games Room, become upstairs, then run southward. To go inside the maze the player must speak to Brian O'Richard. To open your banking concern, speak to Emerald Bridegroom. Y'all cannot have any items at all with yous into the maze. If y'all are going to be traversing the maze it is recommended to buy some free energy potions to restore your run energy between attempts.
There are four safes in the middle of the waiting room. Each fourth dimension you successfully crack it open, you can randomly get gems up to diamond, as well as ten, xx or 40 gold coins. You can purchase a stethoscope from Martin Thwait to increase your chances of successfully cracking the safe open up (note: y'all do not need to use the stethoscope on the wall safes).
Pictured is a typical inventory that you might get with l Thieving and 50 Agility. It takes 20 minutes to get 1 full inventory at this level.
Before you can enter the maze, you lot must get a mystic gem from Brian O'Richard. If yous activate information technology whilst in the maze, you will be teleported back to the waiting room. Yet, this was later patched to where the jewel will simply enter your inventory upon entering the maze.
Contents
- i Route
- i.ane Introduction
- 1.two Map
- 1.3 Section one
- one.four Section two
- ane.five Section iii
- i.half dozen Section 4
- 1.seven Finishing
- 1.8 Tips and tricks
- 2 Reward
- iii Trivia
Route
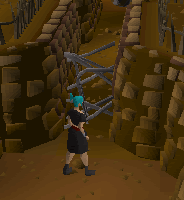
Introduction
The objective of this minigame is to get to the center without getting caught in any of the many traps. With every trap you disarm, your Thieving level is reduced temporarily, and every obstacle y'all become through, your Agility will decrease a piddling. If either of these reaches 0, y'all lose and take to get back to commencement. You will proceeds feel depending on how far you got in the maze. You as well get rewards, which will exist explained at the end of the guide. Additionally, whilst you are in the maze, Prayer is reduced to nothing so that the Rapid Restore prayer cannot be used. Agility, Thieving and Prayer stats are restored to their normal level when the actor leaves the game either via the gem, being caught past a trap or successful completion.
Before yous tin can showtime the minigame, yous need to banking company everything as yous're not allowed to bring anything into the maze. In order to outset the minigame, yous need to talk with Brian O'Richard, and tell him that yous desire to do the maze. He will give players a mystic jewel, which allows players to leave the maze.
Without using the 80 Thieving shortcuts, a single run can take about 7 minutes to complete. An efficient run with 80 Thieving takes iv minutes to complete.
Map
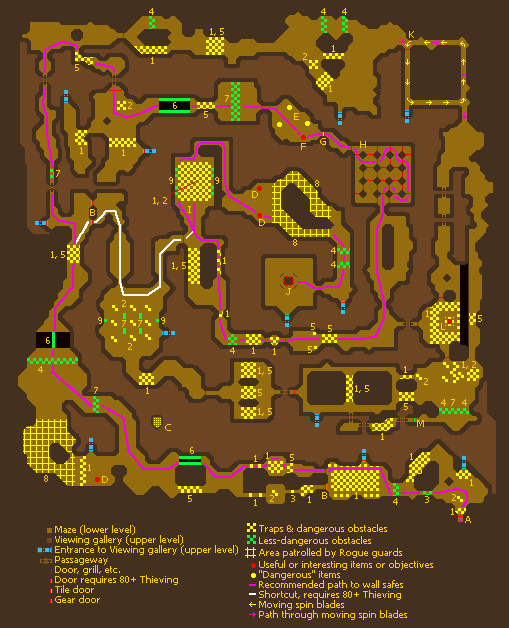
The Rogues' Den maze
Traps and dangerous obstacles are shown in xanthous on the map. You immediately go out the maze if yous trigger a trap or touch a dangerous obstacle. Traps can be disarmed by searching them; this uses up Thieving points. Some traps can be run by or over without triggering them, without using up Thieving points. This is referred to on this page as the "run trick". However, but run over iii traps maximum at a time. Longer runs will trigger a trap.
Less-dangerous obstacles are shown in greenish. You use up Agility points when you pass these obstacles. They are not unsafe unless you run out of Agility points, in which instance you lot will neglect them and immediately get out the maze. When there's a pick betwixt passing traps or obstacles, many players prefer to pass the obstacles. Notwithstanding, this strategy is risky for players with Agility levels lower than virtually 54 or 55, as they can run out of Agility points before they attain the final ii pendulums that block access to the wall safes. Each pendulum requires 3 Agility points, so sentry your Agility level and have some traps instead of obstacles when necessary to ensure having 6 Agility points left.
All doors in the maze are one-way: y'all can only pass them in one management. This includes the doors to get to the viewing gallery and even includes the first door yous use to enter the maze. Passageways, however, are ii-way.
Warnings:
- All traps and obstacles on the chief routes to the wall safes are marked on the map. The map, however, is not pixel-by-pixel accurate to the exact placement of the traps, and so only use it as a guide. See the walkthrough below for a detailed guide of getting through the maze.
- Some of the less-visible traps may take been missed in some of the more remote areas of the map, such as barely-visible flooring or wall traps. Most, if not all, have been found.
Map notes:
- 1) Floor traps of all sorts, including floor spikes and pressure pads.
- two) Spinning blades on pedestals (dangerous obstacles).
- 3) Contortion bars (less-dangerous obstacles).
- 4) Pendulums (less-unsafe obstacles).
- five) Wall traps.
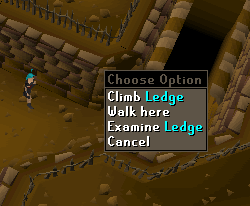
- 6) Ledges, either hand-hold ledges or "bridges" (both less-dangerous obstacles).
- seven) Floor blades (less-unsafe obstacles).
- viii) Areas patrolled by Rogue Guards (dangerous obstacles). Employ flash pulverization to get by them.
- nine) Moving blades subconscious in walls (less-unsafe obstacles).
- A) Entrance to the maze.
- B) Locked doors. Players with level 80+ Thieving tin can pick the locks of these doors. The two locked doors in the due west part of the maze open up a shortcut that is considerably quicker than the standard route.
- C) This room with spikes protruding from the floor tin can be seen from the viewing gallery only plain is not continued to any other role of the maze.
- D) Flash pulverisation, which can exist used to temporarily blind rogue guards.
- E) The 3 tiles marked in yellow on the map are incorrect tiles and will non open the mosaic door.
- F) The tile marked in red on the map is the right tile for the door.
The bottom right is the correct one.
- 1000) The mosaic door, which opens when the right tile is inserted.
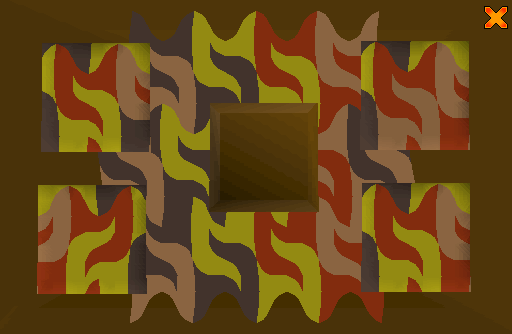
- H) Grill room. There is only one correct path through the grills (shown on the map). The room is not dangerous, notwithstanding, every bit choosing the incorrect grills simply results in y'all having to notice you way back to the starting grill and trying again.
- I) The "room of death". If you are OK for agility points, go on either of the side walls (you will automatically jump out of the manner of the moving blades hidden in the walls). If y'all are running low on agility, make your way beyond the flooring traps (either searching them or running for short distances). Always avert going anywhere near the spinning blades on the pedestals!
- J) Eight wall safes, the objective of the maze. Open whatever one of them.
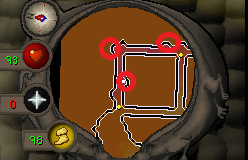
- Chiliad) Two moving, spin-bract obstacles follow the path marked with yellow arrows on the map. The door in the western corridor blocks yous from moving in the same management every bit the spin blades. Instead, you must motion in the directions indicated by the xanthous arrows. Y'all should run down these corridors and time your run to get into the side niches before a spin blade comes through. Note: These obstacles are non on the primary path to go to the wall safes. You can take this route, simply information technology is much longer to reach the safes this way. You lot do have to pass these obstacles if you lot want to get to the chest room.
- L) Breast room. This room has many floor traps, and so be careful. There are traps all side by side to the chest, only y'all can search a trap, disarm it, and accept time to search the chest. However, be sure to search the trap to the front of the breast (the trap immediately due west of the chest). Otherwise, when y'all go to search the chest, yous volition automatically movement to this spot anyway. Almost all players regard the chest every bit a large waste matter of fourth dimension, since information technology simply yields ten coins.
- Thousand) The gear door (not dangerous). You must solve a puzzle consisting of moving four gears to their right positions for the door to open. You tin keep trying every bit long as yous like, and yous can besides just abandon the puzzle and get somewhere else without penalty. The gear door does not atomic number 82 to any place interesting or rewarding.
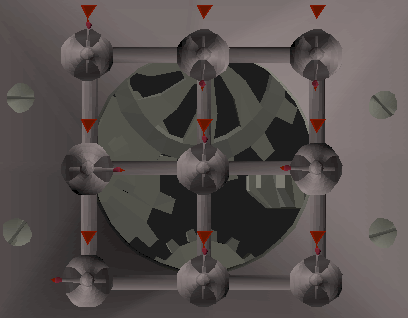
The gear door
Department i
Now open the doorway, and enter the maze. There are some floor traps there. Y'all can laissez passer this by clicking the other side of the floor trap with run enabled, without having to disarm. To disarm 1, merely simply correct-click it, click "Search", and your character volition disarm information technology and you will be able to move on. (Notation: You don't have to disarm all iii!)
Now, go a little to the left, and you will come across some Contortion Bars. Climb through those.
Next, y'all will see a giant swinging pendulum. Just click across it, and your character will jump over information technology.
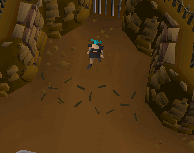
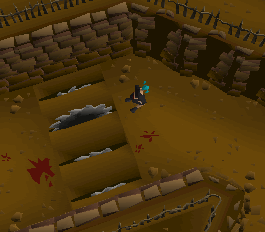
Side by side is a room with dozens of floor traps. You lot volition actually not need to disarm any in this room if you do it correctly. Walk to the right, avoiding the traps, keep going directly, so click on the grill, entering the next room.
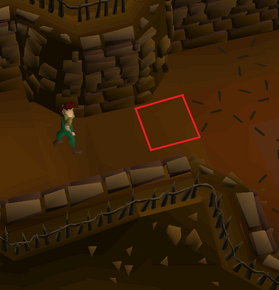
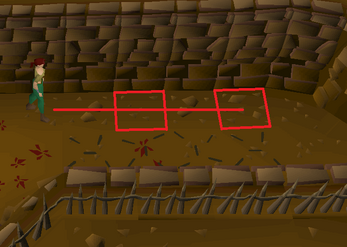
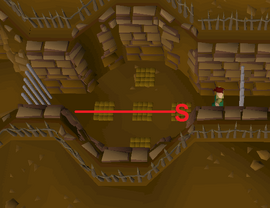
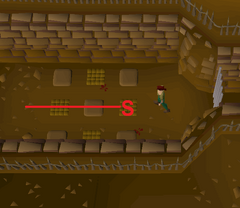
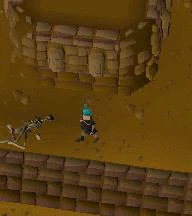
Now, move a piddling bit forward, and hover your cursor (mouse) over the walls. Y'all will somewhen come across "Walk Here / 2 more than options". Enable run, and click to the tile simply later the wall trap shown in the epitome below. If you have 80 or higher Thieving, you can take the southern passage instead, which involves moving effectually a spinning blade carefully so disabling ii obvious floor traps.
Section 2
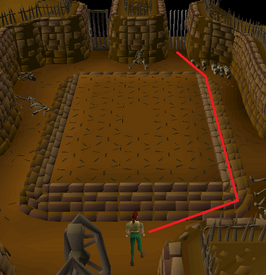
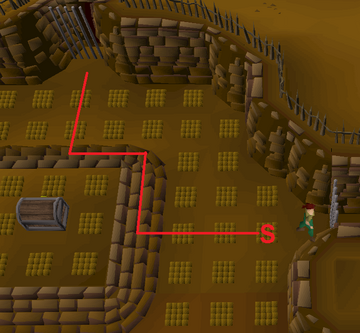
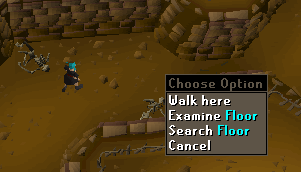
Here'south a room with lots of floor traps again. The all-time route is marked below, make sure to enable run and pause after each trap you lot pass to avoid triggering whatsoever. Search and disarm traps marked with an "S", and move on.

Go on on from at that place, passing 2 floor traps using the run trick, and go to the right. Climb on the ledges.
Now, accept the path to the right, every bit it is not recommended to go to the left because it is much more annoying. You will come across spinning saws, make certain to click on the saw otherwise your character will begin to run to the other side automatically using the left route.
Go forrard, you'll run into 4 pendulums. Laissez passer any ane of them. And then climb the ledge behind them.
Keep going up the maze. Stop when yous come across some flooring traps. There are wall traps hither equally well. To save the most Thieving levels, simply use the run play tricks and footstep to the tile between the wall traps. This keeps you lot from having to waste Thieving levels here.
Section three
If you have fourscore Thieving or higher you tin now use a pregnant shortcut, correct upwardly to the spinning blades room by picklocking the door on your right. Otherwise yous have to go the long way round, as follows:
Go westward and y'all'll see a passage. Pass through it, then cross the spinning saw. Keep going up, then laissez passer through a 2nd passage.
Once you've passed the second passage, go east and go through the grill (door). You'll reach two paths, it is recommended to take the pendulum road.
You will then reach a room with 2 sets of floor traps stay in a straight line and disarm them. The next room is large with 3 paths have the northern path dodging the 2 pendulums.
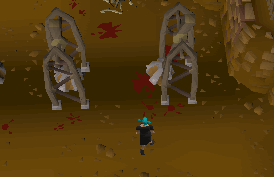
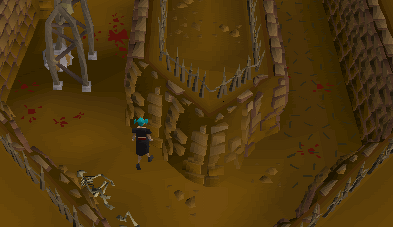
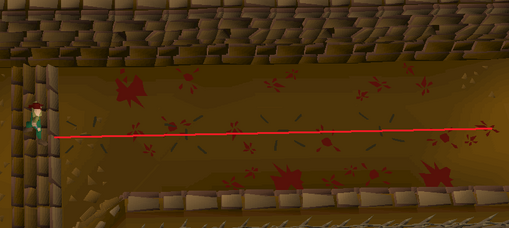
Become upward from there, but BEWARE of the spinning blade! If you go hit by this, you volition be sent back. Get around the spinning bract, and cross the ledge. Merely run to each condom spot afterwards the blades pass, safe spots are highlighted in film below.
After the spinning blade puzzle you will be met with 2 paths; both are similar, however the western route through the passages seems to be more than reliable. Simply run through the passages until you lot are met with a room full of square flooring traps. You just need to search and disarm the traps marked with an "S" as shown beneath.
Careful! You lot will encounter wall traps on the route to the next iii rooms. The next iii rooms feature wall traps and so flooring traps then flooring traps once again with a pendulum at the stop. Yous only need to search or disarm whatsoever of these traps marked with an "S".
Sentinel out every bit in that location is a floor trap right after the pendulum which you lot can use the run pull a fast one on to pass without disarming.
This is followed by another room with ii paths, the easiest route is run tricking the floor traps straight through the centre of the western path. You practise not need to disarm any floor traps hither.
Section 4
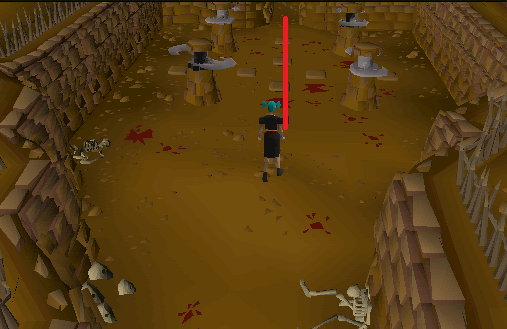
You volition now come into a room with lots of spinning saws. You tin pass all of these traps without disarming because of the tile gap in between them. Just enable run and go past one trap at a time by clicking the tile directly afterwards it.
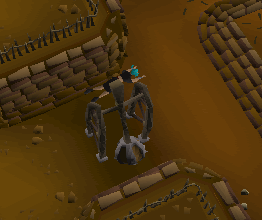
After y'all have passed this room, go along going up the path until you see flash pulverization on the ground and take some. Upward ahead there are two paths, each with one rogue guard patrolling them. If y'all get too close to him, he will send you back to the start. Now, yous must use the wink powder on one of the rogue guards in the path, without getting close to him. When you have used your flash powder on the guard, your graphic symbol will run out and throw it, and the guard volition be dazed for a short fourth dimension. In that time, run upwards the path. Make certain to have some energy left for this section. After you pass the guards in that location will be a fix of pendulums and you will finally make it to the chest room.
Finishing
When you lot attain the final room there will be wall safes similar to the ones found outside. Dandy the safety provides a hazard of getting an particular or a piece of rogue equipment (12.five% chance). It is as well possible to fail the prophylactic groovy which sends you lot back to the starting time without any item rewards.
One time you have croaky the safe, you are sent dorsum to the first, and Brian volition give yous some experience in Thieving and Agility. The amount of feel gained in both skills depends on how many Thieving and Agility obstacles y'all traverse.
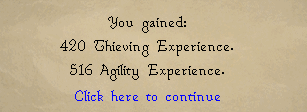
Repeat every bit necessary to get full Rogue.
The Rogue kit will transform into an item of your choice - ether a spade, chisel, rope, or tinderbox. And the best part is that it's stackable, meaning that you tin can accept equally many as you want in your inventory, making them useful for quests and treasure trails.
Tips and tricks
- If you stand up stationary on the tile immediately adjacent to a trap and then run over to the tile on the other side, you will pass over the trap without setting it off. This works for wall traps likewise equally floor tile traps
- This method works for upwardly to 3 tiles' worth of traps. Running over all 3 at once to a clear tile past them will not set off whatever of the traps, and then long equally you lot pass over no more than than 3.
- Using this method advisedly forth the recommended path (without the 80 Thieving shortcut), information technology is possible to complete the maze without convincing any traps, thus allowing you to keep all of your Thieving levels for the safe at the end.
- Taking the recommended route above should only cost about 15 Thieving levels, and so keep that in mind before attempting.
Reward
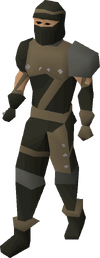
A player wearing rogue armour.
When you finish the maze, you lot will get either one of these items:
- Rogue kit (tin can be made into a rope, chisel, tinderbox, or a spade; once utilize)
- Rogue's equipment crate (one/8 chance), which contains ane piece of rogue equipment:
- Rogue mask (+5 to all defensive stats)
- Rogue body (+10 to all defensive stats)
- Rogue trousers (+7 to all defensive stats)
- Rogue gloves (+2 to all defensive stats)
- Rogue boots (+two to all defensive stats)
While wearing pieces of the rogue equipment, at that place is a chance of pickpocketing twice the loot from an NPC, with the full set guaranteeing double loot. The full set can be stored in a player-endemic house.
Trivia
- Brian O'Richard is a play on the actor'south name Richard O'Brien who used to host a popular Britain Telly program called The Crystal Maze.
| Minigames | |
|---|---|
| Squad games | Barbaric Assault • Smash Furnace • Burthorpe Games Room • Castle Wars • Fishing Trawler • Nightmare Zone • Pest Control • Shades of Mort'ton • Trouble Brewing • Volcanic Mine |
| Solo games | Barrows • Blast mine • Brimhaven Agility Arena • Champions' Challenge • Gnome Brawl • Gnome Restaurant • Impetuous Impulses • Inferno • Mage Arena • Mage Training Arena • Pyramid Plunder • Ranging Gild Activities • Rat Pits • Rogue Trader • Rogues' Den • Sorceress'southward Garden • Tai Bwo Wannai Cleanup • Tears of Guthix • Temple Trekking • Tithe Farm • Treasure Trails • TzHaar Fight Cave |
| PvP games | Bounty Hunter • Castle Wars • Clan Wars • Duel Arena • Last Man Standing • TzHaar Fight Pit |
Source: https://oldschoolrunescape.fandom.com/wiki/Rogues%27_Den
0 Response to "Osrs Rogue Outfit How Do You Know What Box to Pick"
Post a Comment